
About the course
What’s it about?
This course goes over the modeling (and rigging and texturing) of a stylized ‘anime’ style girl character in the free, open-source software Blender. We first create the body, then create the clothing. If you’ve always wanted to know how to model hands and heads, this course has you covered. The goal is to focus on an easy and fun workflow, with a repeatable and easy to remember way of making hands, heads and stylized hair.
The below video goes over the modeling lessons.
Note that more lessons have been added since (full curriculum can be seen by scrolling down on this page).
How long is the course?
The course contains about 8 hours of edited tutorials with voice over.
Can I download the lessons?
Yes, you can download them as ZIP archives, which include the videos, subtitles and blend files, so you can watch it offline, distraction-free, on any of your devices that plays videos.
Which Blender version is this for?
It was made with Blender 4.5 LTS, however no special 'new' Blender features are necessary for the workflow used in the lessons. So feel free to use the Blender version you're currently using.
What experience level is this for?
The course is aimed at beginners, who have explored Blender a little already, and want to move on from making donuts to something really cool: characters. All the tools are explained with voice over, we make the character step by step and gradually ramp up the difficulty so you don't feel overwhelmed. Key presses are displayed (and usually mentioned in the voice over). In case of any misunderstanding or trouble, you can leave a comment under the video and I'll do my best to help!
What do I need in terms of hardware?
Any recent laptop or PC should be able to handle the workflow of the video. We will do a bit of sculpting, in which case the polycount will go up a bit. But most computers from the last 10 years should be able to deal with that. I'm actually using a pretty old PC myself! I do recommend having at least 8GB of RAM, to make the sculpting more smooth.
For the sculpting parts, you will benefit greatly from having some kind of drawing tablet. If you don't have that, you can try using your mouse for sculpting (the sculpting is mainly for pulling/pushing on shapes, and for drawing folds). However I recommend using a drawing tablet as the sculpting is more enjoyable that way.
Are there subtitles?
Yes, subtitles are so far available in English, German, Japanese, Spanish, Portuguese and French. Feel free to suggest other languages. Keep in mind, that the subtitles and translations are made by Teachable's transcription service, which while very good, is not 100% perfect. The voice over is spoken in English.
Can I get a refund if needed?
Yes, you can get a refund if the course isn't your cup of tea. No questions asked. I'm confident that you'll like it though!
Can I use Paypal?
Yes, but you have to choose USD pricing instead of Euro. Scroll down to the bottom of this page to find both pricing options.
What do the lessons teach me?
Below you can see a detailed overview of all the lessons.

Lesson 00 - Setting up Blender and Reference Images
In this lesson, we look at some of the specific Preferences I’m using for modeling and recording, and then we import the reference images into the different 3d views. We also briefly go over how to navigate the 3D views.
There's also a quick overview of the best (or at least, my preferred) way to set up a drawing tablet for sculpting.

Lesson 01 - Shoes (box modeling introduction)
Rather than starting with complex parts of the model, we start with something simple: The shoes of the character.
This way we get an introduction of the basics of Box Modeling, and how to quickly get the shape you want. We also look at how to add Annotations, how to use the Subdiv modifier and how to properly mirror an object.

Lesson 02 - Socks (method 1: Procedural)
This lesson demonstrates a simple but effective method for creating the socks, using procedural Cloud textures with the Displace modifier. Then we adjust the shape using Extrusions and Proportional Editing.

Lesson 03 - Socks (method 2: Sculpting with Cloth Simulations)
As an alternative workflow, we look at creating the same socks but with the Pose Sculpt brush in Sculpt Mode, that uses Cloth Simulation in order to quickly add realistic folds.
We also look at what flipped Normals are and how to solve them, as well as how to use the Grab brush. Then we introduce an extension called LoopTools and look at how to use it to our benefit in this example (this extension is one of the free, default ones for Blender).

Lesson 04 - Socks (method 3: Designing folds with masks)
A second alternative workflow also uses sculpting tools. In this lesson, I want to introduce you to creating folds manually. So as not to overwhelm you, we use the Mask brush to first carefully lay in our strokes. Then we can use the Mesh Filter to inflate them, and the Smooth brush to make these folds look nice.
This gives us an easy introduction to more fold scupting techniques using the Draw brush. Creating nice folds is an important part of creating 3D clothing in general, so it’s good to have a few different workflows under your belt.

Lesson 05 - Legs
We use box modeling again, this time to quickly create the legs. You’ll be surprised at how fast we can create nice looking legs with this technique. To have proper deformations for animation, we add some more geometry to the knee using the Inset tool as well as Vertex Sliding.
That way when the leg bends, the textures don’t get visibly stretched. Using the Grab brush, the socks are made to fit perfectly around the legs.

Lesson 06 - Arms
Making the arms is exactly the same as making the legs, although there is the added challenge of connecting it to the hand later.
But for now, we don’t have to worry about that. Here too, we have to make sure the elbow has enough geometry, like we did with the knee earlier.

Lesson 07 - Torso
The torso is made with box modeling as well. Initially we block the shape out while looking at the references, then in the 3D viewport in perspective mode, we tweak individual Vertices until the shape looks good.
Then we go back to the reference and adjust the shape as needed using Proportional Editing. We also extrude the next. It’s important to prepare the right amount of Vertices in the places where the arms and legs connect.

Lesson 08 - Torso (connecting the limbs)
In this lesson the arms and legs are attached to the torso. Here we look at how to join objects, how to bridge Edges to create geometry between them and how to best use Proportional Editing with separate but joined parts, in order to line them up as close as possible before connecting the geometry.
Then once these parts are all connected, we fine-tune the overall shape before moving on.

Lesson 09 - Hands
We start with the finger, and then we connect them to each other. Then we learn how to reduce the complexity of geometry, by Vertex Sliding and using Auto Merge.
To make sure we have all Quad topology (better for animation) we add some strategic loops to turn triangles into quads. Then we extrude the rest of the hand, and add some Edge Loops so we can extrude the thumb. After that we do some shape adjustments, so the hand looks nice.

Lesson 10 - Hands (connecting to arms)
Now the hands need to be attached to the arms. But there’s a problem: The hand had more Vertices than the arm.
So how to you go from more to less geometry and still keep quad topology? We dive into this as well as how to use sculpt mode to relax and better distribute the geometry.

Lesson 11 - Clothes (part 1 modeling pants)
Clothes are a big part of making a 3D character, so we dedicate several lessons to it. In this first one, we extract geometry from the body and adjust the topology to better suit the clothing.
Here and there we need to add more geometry, so that there’s enough to work with later. Proper topology is important for being able to extrude certain parts, as well as for sculpting folds.

Lesson 12 - Clothes (part 2 modeling pant folds)
In this lesson we extrude certain prepared parts of the pants, so we can add more detail. We also look at how to make geometry more sharp when using Subdivision, and some very useful options in the Bevel menu and the Loop Cut and Slide menu.
We also look at different ways to scale geometry, and how to transform with Individual Origins. Using these techniques, we quickly create the belt and lower pant folds, as well as a subtle rim around the top of these garden pants.

Lesson 13 - Clothes (part 3 Sculpting)
Now that we have exactly the geometry that we need, we can create some nice folds in these clothes. We look at a couple of different techniques, and then use the masking method we used earlier for the socks.
Then we look at how to use the Draw brush to create positive and negative folds. We can also use the Mask in sculpt mode with different Stroke Methods, which allows us to easily create straight lines with the Mask tool.

Lesson 14 - Clothes (part 4 pockets)
Next, we add pockets to the clothing. This is easily done by blocking out the general shape in 2D, and then projecting it onto the pants using Snapping to Faces.
Then, we adjust the sharpness of the pocket edges by adding some more geometry as needed. After that, we sculpt in some folds using the underlying pants for reference.

Lesson 15 - Clothes (part 5 shirt)
Before we can finish the pants, we need to add the shirt, so we know exactly where the suspender straps of the pants should go. This is also done by extracting the geometry from the body.
A duplicate of this geometry is made for use for the upper body and neck.

Lesson 17 - Clothes (part 7 buckles)
Using the Skin modifier, we create some buckles to put on the straps. We also look at how to adjust the straps so they fit through the buckles.

Lesson 18 - Clothes (part 8 buttons)
Starting with a Torus primitive, we create some simple buttons.

Lesson 19 - Head (part 1 blockout)
Before you start messing with complicated head topology, it’s important to block out the general shape. This is done with box modeling. In this lesson we look at using the Grab sculpt brush instead of proportional editing. It’s a great tool for refining shapes like this. We also add a simple nose and ear, all of which will help a lot in the next stages.

Lesson 20 - Head (part 2 topology - front of the face)
After looking at the provided topology guide, we first create the topology in 2D. That makes it a lot easier, as you don’t have to worry about snapping it to the base mesh while creating more geometry.
You just model the correct topology flow in 2D, and then snap it to the 3D blockout. Optionally you can use colours to identify loops, just so that you can see better what’s happening.

Lesson 21 - Head (part 3 topology - ears and back of the head)
Having made the front of the face, we create the back of the head as well as the ear. To create the back of the head we can simply borrow some geometry from the blockout.
Then we connect everything and make sure we have proper topology for subdivision and animation.

Lesson 22 - Head (part 3 topology - shrinkwrap and shape fine-tuning)
After connecting the neck and the head, we use the Grab brush and smooth brush to fine-tune the shape and topology of the head and face.
You’ll be surprised how easy it is to do all this, if you break it down into those steps.

Lesson 23 - Head (part 4 - Mouth Bag and Shape Keys)
Now that the shape of the head looks good, we finish working on the mouth by adding some geometry for the lips and for the inside of the mouth (the "mouth bag"). We then briefly look at how to use Shape Keys for the face.

Lesson 24 - Hair (part 1 big hair shape)
Rather than doing everything with Curves that have a specific profile, we divide the hair workflow into 3 main steps. First, we use the sculpting techniques we’ve learnt so far, to create the main shape of the hair, especially on the back of the head.
Doing this with many separate curves would be very tedious and time-consuming, so doing it this way saves a lot of time, and in my opinion it’s more fun as well.

Lesson 25 - Hair (part 2 - Strands from Curves)
In this video we quickly go over the way hair curves are made, and some tips on making them more "artist friendly". Then we also look at how to make a mesh hair strand, both of which will be important in the next lessons.

Lesson 26 - Hair (part 3 Mesh hair front)
In this lesson, we continue with the mesh hair we made at the end of the previous lesson, and turn it into a hair "clump" of 4 strands. This is then placed on the head using a Lattice, and further refined using some sculpting tools like Grab and Snake Hook.

Lesson 27 - Hair (part 4 Mesh hair side clumps)
Using the same technique, we add clumps of hair strands to the side of the head. Using sculpt tools - mainly Grab and Snake Hook, as well as the Smooth brush - we bring it all together.

Lesson 28 - Hair (part 5 Side bangs)
Using curves, we add the side bangs. Then we convert them to mesh objects, so we can add more details in the next lesson.

Lesson 29 - Hair (part 6 offshoots and split hairs)
Having quad topology is very useful for quickly extruding small hair offshoots that add interesting detail. We can also "rip" the hair strands to split them into smaller sub-strands.

Lesson 30 - Hair (part 7 sculpting and auto retopo)
In this lesson we finish the hair with some sculpting techniques. Sculpting can be tricky, but using a good workflow is half the battle. And that workflow starts with better underlying topology. This is done by remeshing using the right settings.
In this case, we use auto retopology to save time, using the tools built into Blender for that purpose. Then we layer on the detail step by step, starting with low resolution and gradually building it up. This way we avoid lumpy, amateurish results.

Lesson 31 - Ribbon
To tie it all together, we add the bow ribbon on top of the hair. To get nice folds, we use a Cloth simulation.
For good results with cloth simulations in Blender, it's important to show you the effect different scales of objects have and how it influences the simulations. After we've succesfully created the ribbon using simulations, we look at how to finalize the mesh.

Lesson 32 and 33 - UV Unwrapping
In the first lesson, we look at how to UV unwrap. We can save a lot of time and do a lazy "Smart Unwrap", which is fine for texture painting and saves a lot of time
Or if you want, you can do the manual unwrapping. The advantage of that, is that you have a clearly unwrapped 2D version of your model as a texture layout. In the second lesson, the model is unwrapped manually, step by step.

Lesson 34 - Eye modeling and rendering
To create the eyes, don’t use Spheres like you might expect. Instead, we model them as 2D shapes and render them as textures. This allows us to easily change the facial expressions, and it’s easier than rigging eyes and eyelids, and more suitable for strange anime expressions. After modeling the eyes we render them as a PNG texture so we can fine-tune it in a 2D painting application.

Lesson 35 - Eye refinement and Krita introduction
To refine the eye texture, we use the free open-source painting app Krita. In this lesson, we'll go over the basic functionality of painting in Krita, as well as how to use its symmetry function.

Lesson 36 - UV Unwrapping tips
Before we start texturing the rest of the body, to make painting in Blender more efficient (and less laggy) we split the UV's into 3 different tiles, each with their own texture. This lesson also has tips about UV packing and pinning UV islands.

Lesson 37 - UCUPaint and pants texturing
After a quick look at the free add-on UCUPaint, which adds layers to the texture painting interface, we start on painting the pants of the character. We then bake the different layers to a colour texture and apply this to a shadeless material.

Lesson 38 - Head and Hair painting
Continuing with the texturing process, we look at some selection and masking tricks that make painting the hair a breeze. We also paint shadows on the face and neck.

Lesson 39 + 40 - More texture painting and Transparency
We finish with the texture painting of the rest of the clothing, as well as the arms and legs. Then we look at how to paint transparency, to create the illusion of torn sleeves. And we create a shadeless material that supports an alpha channel.

Lesson 41 - 45 - Rigging
In these 5 lessons we look at rigging the character. How do you avoid common issues like clipping of the body through clothes? How do you make sure those separate objects stick perfectly to the surface? What the heck is bone roll? In fact, it's all pretty easy if you know how to do it.

Lesson 46 & 46 - Creating the outline
Using the Grease Pencil Line Art modifier, we create outlines in different colours and with a subtle hand drawn look. We also look at some potential issues and how to overcome them.

Lesson 48 - Posing and Rendering
In this final lesson, we'll have a quick look at posing and then rendering the character. As well as a potential render glitch and how to resolve it.

About the instructor
Hi! I'm Jan, I've been making Blender tutorials since 2017, mostly with 1-minute "Blender Secrets" shared on social media, to almost 300k followers on Instagram. I want to share what I learn, as I know very well how hard it can be to learn Blender. Prior to "Blender Secrets" I was a freelance 3D and motion graphics artist.
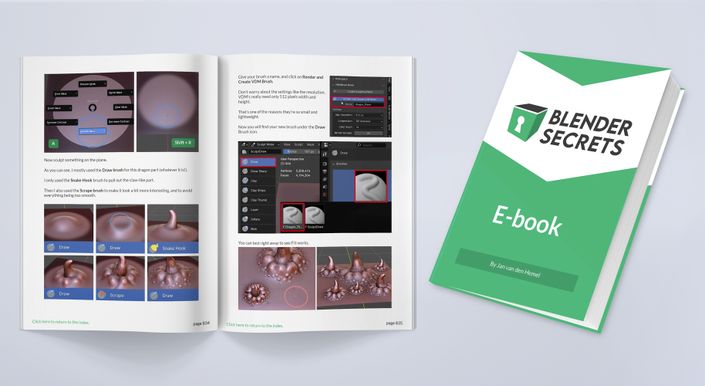
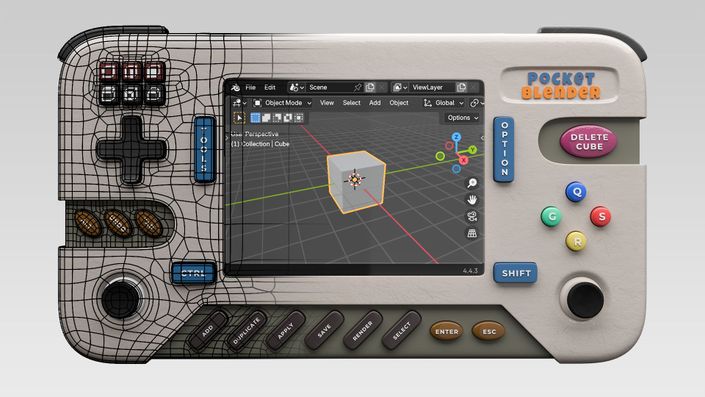
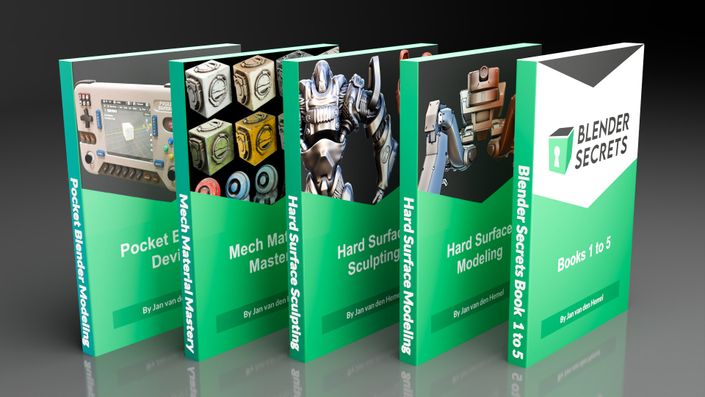
More stuff!
Below are some other things I've made: The Blender Secrets book, a short(ish) modeling course and a huge bundle with all the hard surface courses and the book.

Course Curriculum
- Welcome!
- Lesson 00 - Setting up Blender and Reference Images (9:12)
- Lesson 01 - Shoes (box modeling introduction) (20:05)
- Lesson 02 - Socks (method 1: Procedural) (11:43)
- Lesson 03 - Socks (method 2: Sculpting with Cloth Simulations) (16:08)
- Lesson 04 - Socks (method 3: Designing folds with masks) (20:46)
- Lesson 05 - Legs (12:15)
- Lesson 06 - Arms (9:41)
- Lesson 07 - Torso (13:17)
- Lesson 08 - Torso (connecting the limbs) (8:48)
- Lesson 09 - Hands (14:23)
- Lesson 10 - Hands (connecting to arms) (4:18)
- Lesson 11 - Clothes (part 1 modeling pants) (19:47)
- Lesson 12 - Clothes (part 2 modeling pant folds) (7:42)
- Lesson 13 - Clothes (part 3 Sculpting) (18:21)
- Lesson 14 - Clothes (part 4 pockets) (15:42)
- Lesson 15 - Clothes (part 5 shirt) (14:50)
- Lesson 16 - Clothes (part 6 straps) (10:59)
- Lesson 17 - Clothes (part 7 buckles) (8:43)
- Lesson 18 - Clothes (part 8 buttons) (7:44)
- Lesson 19 - Head (part 1 blockout) (10:56)
- Lesson 20 - Head (part 2 topology - front of the face) (10:59)
- Lesson 21 - Head (part 3 topology - ears and back of the head) (12:44)
- Lesson 22 - Head (part 3 topology - shrinkwrap and shape fine-tuning) (9:47)
- Lesson 23 - Head (part 4 - Mouth Bag and Shape Keys) (7:57)
- Lesson 24 - Hair (part 1 - Main big hair shape) (8:32)
- Lesson 25 - Hair (part 2 - Strands from Curves) (7:03)
- Lesson 26 - Hair (part 3 - Mesh Hair Front) (10:58)
- Lesson 27 - Hair (part 4 - Mesh Hair Side Clumps) (13:41)
- Lesson 28 - Hair (part 5 - Side bangs) (8:29)
- Lesson 29 - Hair (part 6 - offshoots and split hairs) (10:11)
- Lesson 30 - Hair (part 7 - sculpting and tips for auto retopo) (15:48)
- Lesson 31 - Hair bow ribbon (16:37)
- Lesson 32 - UV unwrapping part 1 (13:27)
- Lesson 33 - UV unwrapping part 2 (26:44)
- Lesson 34 - Eyes modeling and exporting (12:04)
- Lesson 35 - Eyes fine-tuning and Krita introduction (18:23)
- Lesson 36 - Texturing (UV Unwrapping tips) (7:49)
- Lesson 37- Texturing (Ucupaint - pants) (22:53)
- Lesson 38 - Texturing (Hair and Head) (18:37)
- Lesson 39 - Texturing (Limbs and other clothes) (26:05)
- Lesson 40 - Texturing (Transparency) (5:23)
- Lesson 41 - Rigging - Editing the Metarig (10:45)
- Lesson 42 - Rigging - Automatic Weights (5:55)
- Lesson 43 - Rigging - Bone Roll (5:25)
- Lesson 44 - Rigging - Rig Data Transfer (4:22)
- Lesson 45 - Rigging - Separate Objects (5:02)
- Lesson 46 - Adding an ouline with the Line Art modifier (part 1) (13:13)
- Lesson 47 - Adding an outline with the Line Art modifier (part 2) (11:23)
- Lesson 48 - Posing and Rendering the character (1:51)