Hard Surface Modeling for Beginners

Why this Course?
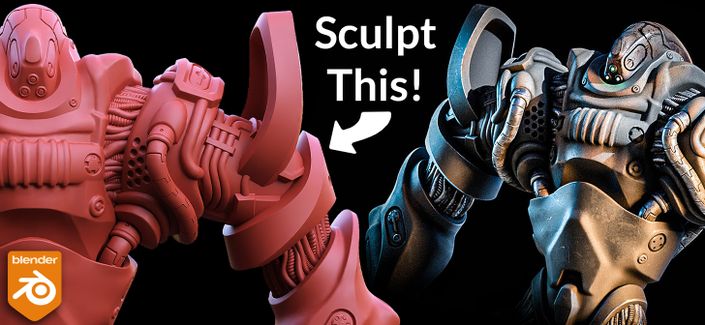
Creating mechanical 3D models in Blender can be approached in a variety of ways. If you don’t have concept art, you can dive straight into 3D by blocking out shapes and using sculpting techniques. This method allows you to design and model simultaneously—and I even have a video course dedicated to that approach.
But what if you do have detailed concept art and want to stay true to it? That can be a bit more challenging. That’s exactly where this new course comes in. By mastering the proper workflow for modeling from reference images, you’ll gain the skills and confidence to model almost anything with precision and ease.
What’s in the course?
This course includes concept art and orthographic reference images created by talented concept artist Kenn Yap, also known as Chromamoma. I’ve been a fan of Kenn’s work for years and am very excited to collaborate with him on this course.
The course is designed for you to follow along step by step. I don’t skip any parts, and I provide Blend files for each stage of the modeling process alongside the lessons.
The lessons are kept concise so you can, for example, easily complete one per day. Additionally, you can download the lessons for offline use—perfect if you’re traveling or don’t always have access to the internet.
Course Structure
The course is divided into two main chapters:
- Chapter 1: Setting up reference images and creating the initial iteration of the model using the best modeling techniques for each part.
- Chapter 2: Refining the model by creating proper quad topology, as you would prepare it for film production (so the surface supports for example a detailed sculpt pass for damage and small details).
- Chapters 3 - 5 (currently in production) deals with everything from UV unwrapping, rendering to exporting the model.
Course Schedule
Currently, the course is still in development. That means that while there is already over 17 hours of content, there is still more to come.
All the modeling lessons have been published.
Chapter 1: Blocking out the mech (5 hours, 100% Available)
Chapter 2: Retopology (12 hours, 100% Available)
Chapter 3: UV Unwrapping and Materials (Currently in production, some lessons already available)
Chapter 4: Rigging and Animation (Currently in production)
Chapter 5: Exporting and Rendering (Currently in production)
What's in the course?
In this video we have an in-depth look at what's inside the video course, my motivation for creating it, and how it can benefit you.
Chapter 1 Details
The first chapter consists of 5 hours of content across 40 lessons, focusing on non-destructive and modifier-based workflows. This approach keeps the process flexible while maintaining consistency, such as uniform bevels throughout the model.
I also share unique tips you won’t find elsewhere, like how to place objects along a curve without deformation or how to leverage lesser-known options in the Bevel modifier. Whenever applicable, I explain multiple ways to accomplish a task and why I chose a specific technique.
Chapter 2 Details
The second chapter consists of 12 hours and guides you through transforming your Chapter 1 model into a game-ready and animation-ready asset.
Splitting the process into two stages ensures a higher-quality final result. Think of it like creating a detailed sketch before painting: by tackling the model in manageable chunks, you avoid feeling overwhelmed and can focus on accuracy and refinement at each stage.
Additional Details
- Student Support: You can ask questions directly in the comment section under each lesson, and I’ll respond as soon as possible.
- Requirements: The course only requires Blender—no extra software or paid add-ons are needed.
- Blender Version: The course is developed with Blender 4.3, but you can follow along using older versions. If you run into UI differences, feel free to ask for help.
-
Bundle Discount: A Hard Surface bundle is also available, which includes this course along with the Hard Surface Sculpting course, Mech Materials course, and my 2000-page Blender Secrets PDF and accompanying videos. The bundle offers significant savings (even more than the Early Bird discount) and makes you a well-rounded hard surface modeler.
Kitbash greebles
One of the assets you'll receive with the course is a greebles kit for kitbashing additional detail. These are all carefully crafted UV-unwrapped and subdivision-ready meshes. They are marked as assets, so they can be easily added to your asset browser and dragged and dropped into the scene.

Below you can see some rendered teaser footage.

Your instructor
I’m Jan—a 3D artist and online teacher. Over the past seven years, I’ve created nearly 900 one-minute Blender tutorials, all available on YouTube. I love Blender not just for its versatility in bringing any idea to life but also for its friendly and supportive creative community.
Before focusing on teaching, I ran a motion graphics company, creating 3D animations for clients. However, for the past four years, I’ve been fortunate to dedicate my time exclusively to producing Blender tutorials.
My goal is to deliver high-quality lessons without unnecessary fluff and which focus on the things that you really need to know to learn Blender. I want you to feel proud of what you create and realize that, with the skills you’ve gained, you can bring any idea to life.
Student Reviews
Below you can see some works in progress and reviews from some of the early students that have enrolled in the course in October 2024, while the first chapter was still in production.

Thomas Buchmann
"The videos have a proper length, are well explained and easy to follow. I think a video should not be longer than 20 min, otherwise you lose concentration, at least I do. I especially liked the explanation of the sculpting part for the fabric covered joints. Showing the sculpting feature on a simple mesh as an example and than put it into practise on the actual mesh was a good choice."

Leo DeGrance
"Enjoyed the course so far. This gradual release schedule works well for me. Small steps every week fits into my schedule very well. For some reason, full courses released all at once, seem overwhelming and I gradually lose interest. Like episodic television, this kind of schedule keeps me coming back to see what's going to happen in the next episode. The length of each video is just right."

Christian
"Well done Jan and a big thank you... with this training you offer us a very professional working method... with each video I discover a practical tip... impressive"

LT Walton
"I had heard and seen other YouTube tutorials and streams on SubD modelling, but following along with this course, I learned quite a lot. My own experiments with Booleans, for example, weren't all that great. But this course explained when to use them and explained the flexibility in their use for non-destructive modelling. Key in crafting mockups and concept models, prior to finalizing and locking in any changes. I utilized what I learned in creating a mockup of a Monorail train."

Robert Elder
"I appreciate the shortish videos, they seemed well focused. I learned a number of tricks, such as making pipes from a single Vert, Flattening Co-planer surfaces, Copying select modifiers, etc. I found the detailed work done on the front leg where our Bevel transitioned to a curve. Good info around working efficiently as well. Striking the balance in terms of skill level is challenging. I found this to be intermediate in relation to my skills... which is just about perfect."

Maria Wenzler
"Happy so far. Thanks a lot for this course. And many thanks for the good support. I'm very excited about what's coming next."

Maran Wasan
"First of all, I was very happy with the length of the lectures. I work full time and one or two lectures fit perfectly into my morning schedule. In other courses this was often frustrating because one unit took up so much time. The explanations are very clear and easy to understand.
I was surprised by the realisation of the blueprint. I've modelled things from blueprints before, but it never occurred to me to colour them and I didn't know how to get that colour into the model. It makes it so much clearer. But there were so many tricks and tips that I'm very grateful for, such as how to achieve graphic consistency by using the same bevels. I was also very grateful for the good and quick support in case of problems, both with the lessons and of a technical nature. Jan, you are a good guy. I can only recommend buying this course."

Richard Dana
"you are an excellent teacher. I have really enjoyed this course so far so I guess modelling would be my favorite endeavor in Blender as far as future tutorials are concerned."

Anonymous
"I liked how it was explained and that other alternative methods for doing a particular action were pointed out. The pace was good and making use of not easily come by tips were introduced in the course such as using sculpt tools in hard surface modelling and the copy attributes menu. Applying a tapered bevel to an edge was also pretty cool thing I learned."
Course Curriculum
- Lesson 001 - Setting up Reference Images (15:05)
- Lesson 002 - Horizontal Cylinder (8:33)
- Lesson 003 - Vertical Cylinder Bottom (5:29)
- Lesson 004 - Vertical Cylinder Top (15:52)
- Lesson 005 - Body Front (15:11)
- Lesson 006 A - Loop Tools and F2 and Flipped Normals (4:34)
- Lesson 006 B - Body Back (24:32)
- Lesson 007 - Color IDs (2:55)
- Lesson 008 - Undercarriage part 1 (Object Color IDs) (4:08)
- Lesson 009 - Undercarriage part 2 (Start with what is visible) (4:33)
- Lesson 010 - Undercarriage part 3 (Determining the correct shape) (3:48)
- Lesson 011 - Undercarriage part 4 (Double Vertices) (8:00)
- Lesson 012 - Undercarriage part 5 (Knife Tool and Loop Tools Flatten) (6:44)
- Lesson 013 - Intake (Inset Boundary option) (5:02)
- Lesson 014 - Lower Hind Legs part 1 (mixing different Bevel methods) (6:14)
- Lesson 015 - Lower Hind Legs part 2 (Solidify and extrude along normals) (9:59)
- Lesson 016 - Upper Hind Legs part 1 (Another bevel method and Boolean slices) (9:48)
- Lesson 017 - Upper Hind Legs part 2 (Copy modifiers, Linked Duplicates) (5:41)
- Lesson 018 - Fabric covered Joint (Tool basics and Sculpting in Blender 4.3) (9:02)
- Lesson 019 - Fabric covered Joint (Practical example) (9:33)
- Lesson 020 - Quad View (3:32)
- Lesson 021 - Front Leg part 1 (Side parts and Local transformations) (7:04)
- Lesson 022 - Front Leg part 2 (Middle part and Solidify modifier) (8:42)
- Lesson 023 - Front Leg part 3 (Extra Object add-on and Skin modifier) (10:29)
- Lesson 024 - Front Leg part 4 (Bevel from sharp to soft) (11:23)
- Lesson 025 - Front Leg part 5 (Boolean cuts) (3:24)
- Lesson 026 - Front Leg part 6 (Combining Selection modes) (11:42)
- Lesson 027 - Front Leg Foot and Knee Joints (Extrude Manifold) (11:09)
- Lesson 028 - Finishing the front leg (7:00)
- Lesson 029 - Mirroring and Copy Attributes menu (3:17)
- Lesson 030 - Foot (12:54)
- Lesson 031 - Railings (7:26)
- Lesson 032 - Pipes (7:05)
- Lesson 033 - Mirroring Duplicating and Rotating the legs (6:57)
- Lesson 034 - Cylinder along Pipe (two methods) (9:04)
- Lesson 035 - More Cylinders (5:05)
- Lesson 036 - Turret Camera (Proportional Falloff) (5:02)
- Lesson 037 - Adjusting railing (Active Element Transform) (3:05)
- Lesson 038 - Additional handholds (3:24)
- Lesson 039 - Turret engine (5:29)
- Lesson 040 - Final bits (6:45)
- Lesson 041 - Subdiv Theory - Cylinder Caps (11:26)
- Lesson 042 - Subdiv Theory - Why Retopo? Concept versus Production model (11:17)
- Lesson 043 - Subdiv Theory - How to model Sharp Corners (2:15)
- Lesson 044 - Retopo of Cylinders (Hole in side of Cylinder) (8:57)
- Lesson 045 - Retopo of Cylinders (Rectangular hole in front of Cylinder) (9:11)
- Lesson 046 - Retopo of Cylinders (Round holes) (1:56)
- Lesson 047 - Retopo of Cylinders (Rear Cylinder) (7:44)
- Lesson 048 - Retopo of Cylinders (Holes in rear Cylinder) (10:53)
- Lesson 049 - Retopo of Cylinders (Triangular detail) (3:32)
- Lesson 050 - Body Back - Getting started (4:49)
- Lesson 051 - Body Back - Connecting the dots (6:24)
- Lesson 052 - Body Back - Evenly Distributed Faces (5:19)
- Lesson 053 - Body Back - Triple Edging (2:41)
- Lesson 054 - Body Back - Fixing N-gons (8:40)
- Lessons 055 - Railing Connection 1 (10:03)
- Lessons 056 - Railing Connection 2 (5:51)
- Lessons 057 - Redoing The Railing (6:24)
- Lessons 058 - Small Round Holes (4:40)
- Lessons 059 - Capsule Shaped Holes Boolean (11:21)
- Lessons 060 - Capsule Shaped Holes Clean-Up (7:03)
- Lesson 061 - Small topology reduction (3:58)
- Lesson 062 - Panel Cuts and boolean adjustments (8:56)
- Lesson 063 - Separating Panels (4:18)
- Lesson 064 - Connecting Vertices (11:53)
- Lesson 065 - Adding Loops for more evenly distributed Quads (3:21)
- Lesson 066 - Adding the rims (10:11)
- Lesson 067 - Triple Edge Panel 1 (9:24)
- Lesson 068 - Triple Edge Panel 2 (5:09)
- Lesson 069 - Triple Edge Panel 3 (17:15)
- Lesson 070 - Triple Edge Panel 4 (10:14)
- Lesson 071 - Triple Edge Panel 5 (9:36)
- Lesson 072 - Triple Edge Panel 6 (5:08)
- Lesson 073 - Body Front Mirror (3:36)
- Lesson 074 Front detail - hole (2:24)
- Lesson 075 Front detail - diagonal shape part 1 (5:50)
- Lesson 076 Front detail - diagonal shape part 2 (9:43)
- Lesson 077 - Turret Bottom part 1 (cutting holes) (11:08)
- Lesson 078 - Turret Bottom part 2 (shrinkwrap and more) (10:09)
- Lesson 079 - Turrett Top part 1 (4:35)
- Lesson 080 - Turret Top Part 2 (Front hole) (6:16)
- Lesson 081 - Turret Top Part 3 (Panel Cuts) (9:34)
- Lesson 082 - Turret Top Front Panel Detail (Preparing the surface) (8:14)
- Lesson 083 - Turret Top Front Panel Detail (Asset Browser) (9:54)
- Lesson 084 - Turret Top Side Panel (Hole 1) (7:51)
- Lesson 085 - Turret Top Side Panel (Hole 2) (3:53)
- Lesson 086 - Turret Top Back Panel (6:50)
- Lesson 087 - Turret Top - Upper Panel (Surface + Sculpt Mode Tip) (4:30)
- Lesson 088 - Turret Top - Upper Panel (Holes) (10:44)
- Lesson 089 - Turret Top - Wrapping up (10:45)
- Lesson 090 - Undercarriage Quads (5:32)
- Lesson 091 - Undercarriage Details Annotations (2:57)
- Lesson 092 - Undercarriage holes pt1 (Ripping) (4:53)
- Lesson 093 - Undercarriage holes pt2 (holes) (10:16)
- Lesson 094 - Undercarriage holes pt3 (5:16)
- Lesson 095 - Undercarriage holes pt4 (rectangle holes) (8:15)
- Lesson 096 - Undercarriage holes pt5 (round holes) (8:08)
- Lesson 097 - Undercarriage holes pt6 (just a few holes left...) (6:58)
- Lesson 098 - Undercarriage holes pt7 (puzzle solving) (9:52)
- Lesson 099 - Front Leg (N-gons to Quads - applying modifiers) (3:01)
- Lesson 100 - Front Leg (N-gons to Quads - preparing surfaces pt1) (6:50)
- Lesson 101 - Front Leg (N-gons to Quads - preparing surfaces pt2) (12:34)
- Lesson 102 - Front Leg (Redo and retopo) (6:45)
- Lesson 103 - Front Leg (Shrinkwrap and bevel) (4:49)
- Lesson 104 - Front Leg (Panel Cut and Bevels) (14:06)
- Lesson 105 - Hip Front Panel (Better topology) (7:12)
- Lesson 106 - Hip Front Panel (Corners and Vertex Creasing) (4:48)
- Lesson 107 - Hip Other Panels (5:04)
- Lesson 108 - Shin part 1 (surface prep) (7:38)
- Lesson 109 - Shin part 2 (holes) (9:25)
- Lesson 110 - Shin part 3 (middle part) (7:34)
- Lesson 111 - Shin part 4 (Solidify and bevels) (8:55)
- Lesson 112 - Shin part 5 (align to view - zoom to mouse cursor) (9:52)
- Lesson 113 - Diagonal Cutout (Vertex Snapping) (16:07)
- Lesson 114 - Kneepad (Mirror with Rotated Empty) (8:06)
- Lesson 115 - Knee (14:48)
- Lesson 116 - Small Details - Edge Flow (14:34)
- Lesson 117 - Side Cylinders (9:40)
- Lesson 118 - Hind Leg Thigh Retopo (14:44)
- Lesson 119 - Hind Leg Thigh Details (10:46)
- Lesson 120 - Hind Leg Calf Retopo (9:25)
- Lesson 121 - Foot - Ring Around Rail (1:27)
- Lesson 122 - Hind Leg Calf Retopo continued (4:10)
- Lesson 123 - Hind Leg Foot Retopo (15:30)
- Lesson 124 - Foot (5:08)
- Lesson 125 - Some More Foot Holes (3:47)
- Lesson 126 - Cloth Covered Joint (Other Method) (11:50)
- Lesson 127 - Finishing legs and knees (11:01)
- Lesson 128 - Finishing legs and feet (8:52)
- Lesson 129 - Various bits and bobs (9:29)
- Lesson 130 - Tubes and handles (14:23)
My other products
Below you can check out my other courses and my best-seller, the 2000-page Blender Secrets PDF.


